If you are searching for how to organize craft supplies in a small space, the fastest route is three levers in order: vertical storage first, a rolling or fold-away surface for a work zone, and clear divided containers for anything small. Purge before you buy a single bin. When supplies are grouped, labelled and within a child’s reach, projects actually get finished.
Most craft corners in small homes fail for the same reason. Nothing is missing exactly, it is just spread across a kitchen drawer, a closet shelf, the console table and a tote in the car. Gathering materials takes longer than making the thing, so the project gets put off. Then it gets forgotten.
What follows is the system I use and the one I hand to friends who ask: a seven-step process that works in a closet, a corner of the dining room, or a shared playroom. Budget about two hours the first time, and 15 minutes a week after that.
Table of Contents
- 1What You Need
- 2Step-by-Step: How to Organize Craft Supplies in a Small Space
- 31. Measure the space you actually have
- 42. Sort supplies into keep, donate, sell and trash piles
- 53. Group supplies by function and how often you use them
- 64. Pick containers that fit the group and the shelf
- 75. Put the most-used supplies within reach
- 86. Use vertical and hidden space
- 97. Build a return system and a weekly reset
- 10Common Mistakes
- 11Frequently Asked Questions
- 12What are the best containers for organizing craft supplies in a small space?
- 13How do I organize craft supplies without a craft room?
- 14How do I stop losing tiny craft supplies?
- 15How do I declutter craft supplies I never use?
- 16What is the best way to store paper and scrapbook supplies?
- 17How do I organize craft supplies in a rented apartment with no drilling?
- 18Conclusion
What You Need
You need very little to start, and most of it you already own. The list below is the full kit for the system, not a shopping list.
- Measuring tape and a phone photo of each storage spot. The photo matters more than the numbers, because it shows the wall, the baseboard and the outlet you forgot about.
- Four sorting boxes or bags labelled keep, donate, sell and trash. Floor space or the bed works fine.
- Uniform bins in one or two sizes. Matching containers are what make a small space look calm and let you stack to the ceiling.
- Handled baskets or open-front bins for the groups a child reaches for most.
- Lidded boxes for dust-prone supplies, outgrown kits and anything that must stay together.
- Hooks, rails or adhesive-mounted pockets for tools, ribbon, scissors and templates.
- Shelf risers that double a cabinet’s usable shelf count without new hardware.
- Dividers for drawers: adjustable, for the loose supplies that otherwise become one soup of markers, clips and sequins.
- Hanging file folders or magazine holders for printable sheets, cardstock and colouring pages.
- Labels plus a pen. Paper and painter’s tape work; a label maker is a nicety, not a requirement.
- One inventory method. A phone photo of each shelf with a date, or a one-page list by container. The list is what stops duplicate purchases later.
The exact list depends on your space, the crafts you actually do, and whether children use the station on their own. A toddler’s craft corner needs closed bins and blunt tools. An adult’s needs open trays and visible paper. Decide that before you buy.
Step-by-Step: How to Organize Craft Supplies in a Small Space
1. Measure the space you actually have
Record four numbers for every candidate spot: width between the wall edge and the nearest obstacle, height of clear wall, depth of the shelf or drawer, and floor clearance if furniture sits there.
Include the awkward space. Measure the gap above the top shelf, under the desk, inside the linen closet, on the back of the closet door, and the full depth of the under-bed area. Most small craft corners come with 10 to 12 inches of usable shelf spacing and shelves only 8 to 10 inches deep, and knowing that before you shop saves the pile of bins that never fit.
How you know it worked: you have a number in hand for every spot, and you know which obstacles, outlets and trim you have to work around. No shopping yet.
2. Sort supplies into keep, donate, sell and trash piles
Pull everything out and put it on the floor or the bed, all at once. Half-done sorting always leaves a second hidden pile, which defeats the point.
Be honest with a simple test: if you have not used it in the last 12 months and you are not in the middle of a project, it goes to donate or sell. Duplicates go too, even the good ones. A full set of 12 markers, all the same colour, does not become more useful with age.
Test what you keep before it goes back in a bin. Markers that have dried to a stub, glue that will not stick, paint gone chalky, and vinyl transfer tape that has lost its tack are all trash, not treasures. Testing costs two minutes; rediscovering a dead marker mid-project costs the whole afternoon.
How you know it worked: your keep pile fits in a fraction of the space the supplies occupied before. On most shelves that fraction is roughly half, and that is the number that tells you the rest of the plan is worth doing.
3. Group supplies by function and how often you use them
Group by function rather than by storage type. Paper, colouring sheets, paint, glue, scissors, beads, fabric, yarn and tools are groups. “Blue things” is not a group.
Then sort each group by frequency, and use this rule: weekly items live where a child or a tired adult can reach them in one movement. Monthly items go one level up or one shelf back. Seasonal and holiday supplies leave the room entirely and live in a lidded tote under the bed or at the top of the closet.
Groups that belong together stay together. Paint, brushes, water cups and paper belong in one box because a project needs all four. Splitting them across four shelves is what turns a tidy system back into a hunt.
4. Pick containers that fit the group and the shelf
Match the container to the group, and the group to the dimensions you measured in step 1.
- Shallow open bins for markers, glue sticks, crayons and anything a child should be able to reach into without lifting out the contents.
- Handled baskets for the everyday pull-out groups, because a handle means you can see the label while carrying it.
- Lidded clear boxes for dust-prone, rarely used or mixed-material groups such as sequins, beads and seasonal kits.
- Drawers with dividers for scissors, pens, rulers, small scissors and clips, which otherwise sink to the bottom and are lost.
- Hanging folders and magazine holders for full sheets, so cardstock and printable colouring pages stay flat and undamaged instead of curling on a shelf.
- Jars, mugs and upcycled spice racks for the tall narrow things: embroidery floss, paintbrushes, ribbon spools, markers standing on end.
Label everything on the front face, and write the contents on the lid of lidded boxes. Small parts get a second layer: people in r/crafting put beads, buttons, brads and eyelets in tiny pill bags, snack bags or sandwich bags, then store the little bags inside one larger labelled container. It is the only method that has survived for me, and it is what stops those items migrating to the bottom of the bag forever.
If you rent, the whole kit works with adhesive hooks, tension rods, over-the-door racks and removable bins. Nothing above requires a drill.
5. Put the most-used supplies within reach
Eye level and hip level are the two most valuable shelves you own. Put the weekly groups there, in the order they get used.
Weight goes low. Paint bottles, jars of water, clay, heavy tool kits and boxes of cardstock belong on the bottom shelf or the floor, both for safety and for how you actually unload them. Nothing that needs two hands should live above shoulder height.
Keep one open tray at the work surface for the current session only: the three or four things actually in use. A table that is cleared at the end of a session is the difference between a usable corner and a permanent obstacle. People in r/organizing say the same thing about art supplies: keep them where you actually work, not somewhere tidier but out of sight.
How you know it worked: pick three weekly items at random and ask a child to fetch each one. If they can do it without you, reach is right.
6. Use vertical and hidden space
Most of the usable storage in a small craft corner is off the floor. Add it before you add furniture.
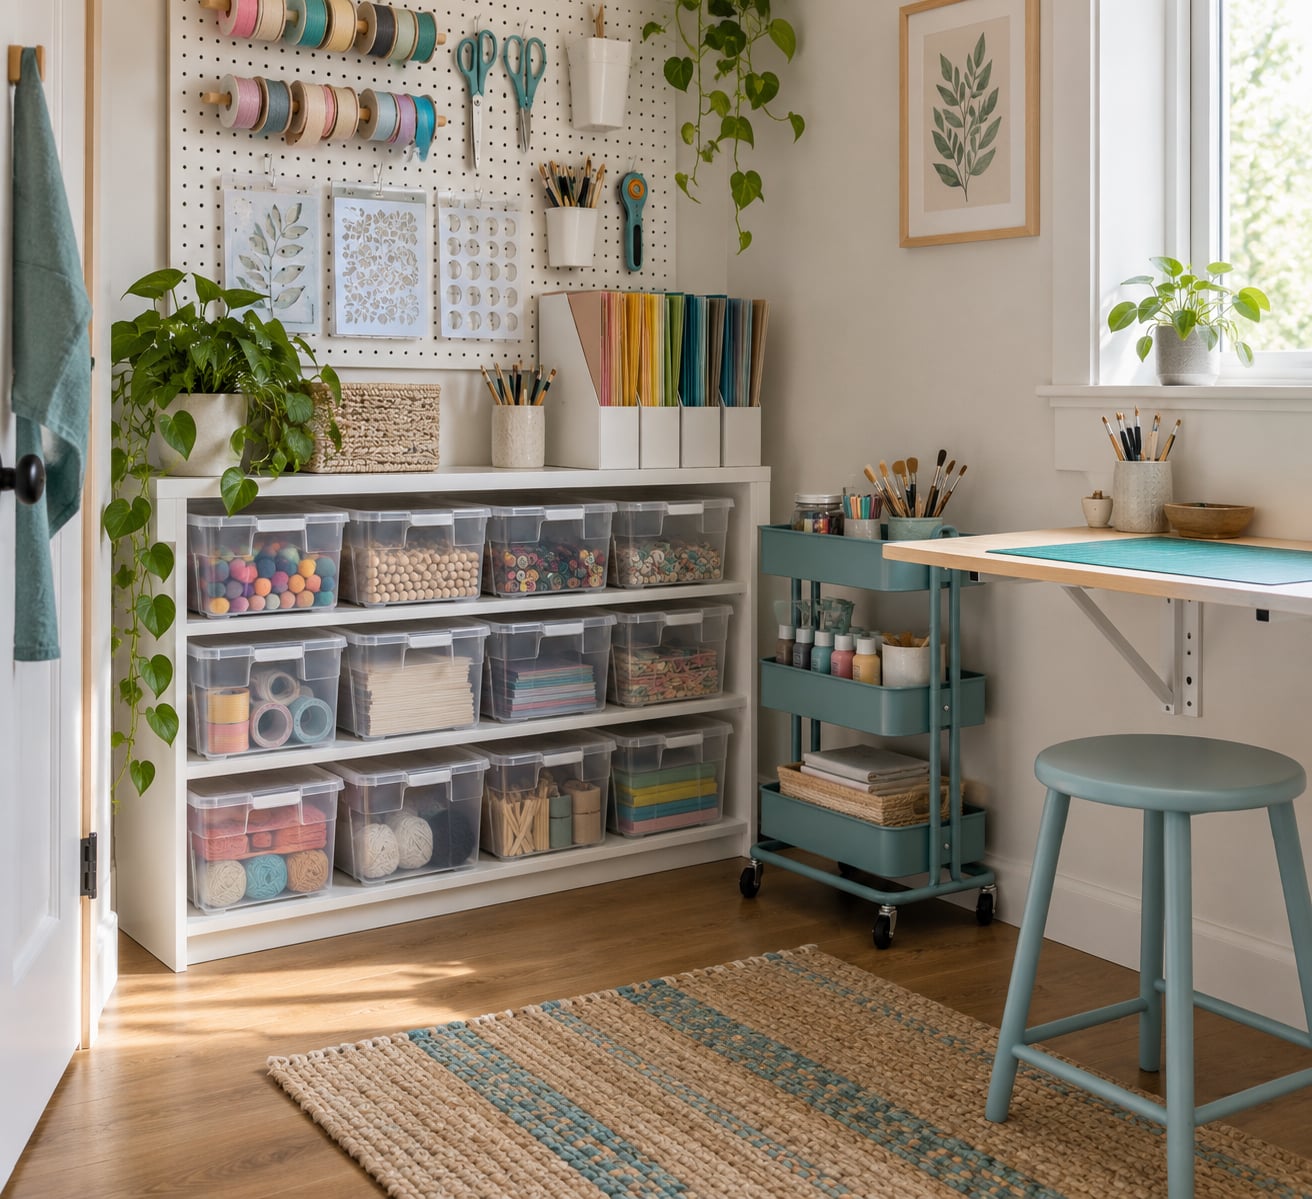
- Wall space: a pegboard panel, shallow floating shelves, a rail with S-hooks, or adhesive pockets for stencils and templates. Keep clearance for rulers and template sheets so nothing gets scratched or bent.
- Behind the door: an over-the-door organiser on the back of a closet door holds flat paper, cutting mats, backing paper and picture frames without costing floor space.
- Under the shelf or desk: shallow under-shelf baskets or a low rolling drawer that tucks under a work table when the project is done.
- Magnets and metal rails for suitable metal tools only. Magnetic strips hold stencils, small rulers, embroidery hoops and tins well, and nothing heavy or breakable.
- The closet itself: a tension rod holds paper rolls and vinyl, and a narrow shelf above a door works as a high shelf in a room with no free wall.
- Non-craft rooms: under-bed bins for seasonal and overflow supplies, a pantry shelf for clean paper and cardstock, a linen closet shelf for fabric folded in bolts.
Safety is part of this step. Anything sharp, hot or small enough to swallow goes in a closed bin above the reach of a child or in a high, lidded container on top of a cabinet, not on an open low shelf. If a Cricut, heat press or printer shares the room, give it a clear landing spot of its own rather than a crowded shelf; people who machine in small homes constantly trade shelf space for surface space, and the machine keeps.
7. Build a return system and a weekly reset
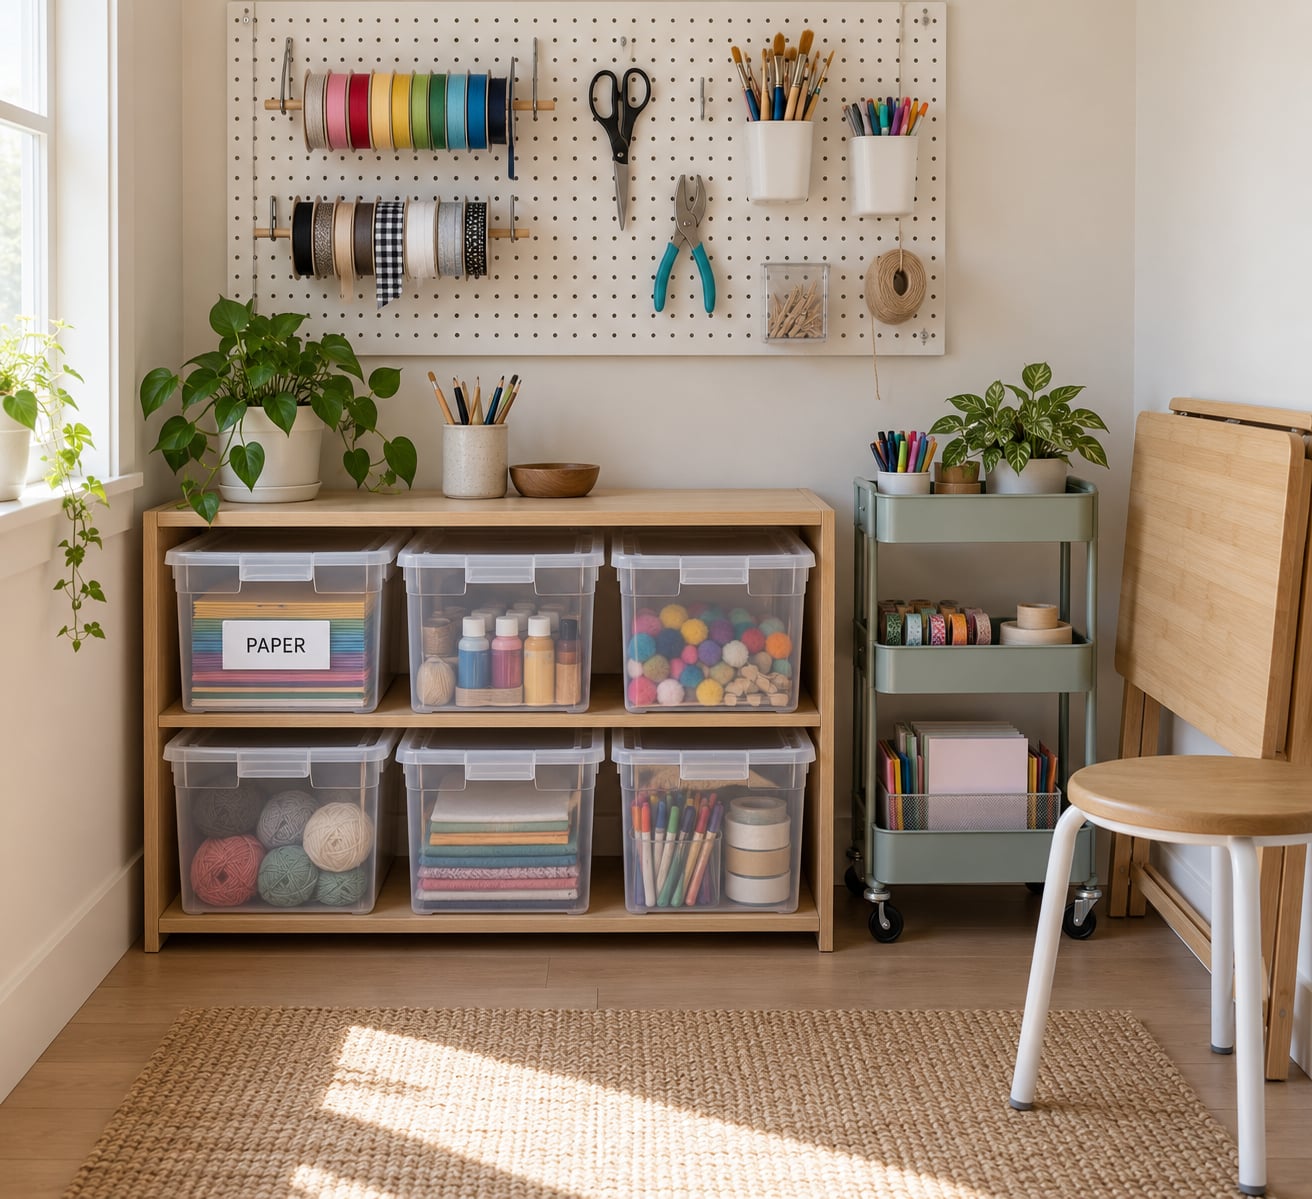
An organised corner that lasts one week is a styled photo, not a system. Return systems are what keep it going, and they are simple: fixed container positions, a clear home for every group, and a short cleanup routine.
Give each work in progress project a shallow tray, a labelled zip bag, or a project bag. On the front write the project name, the stage it reached and what is still needed. r/crafting and r/scrapbooking threads describe the same fix for the same problem: an interrupted project gets a name, and a named project is one you can restart instead of abandoning.
Add one overflow basket for the things that do not have a home yet. A visible “not yet sorted” basket beats a hidden drawer, because you can see it. Empty it weekly or it becomes the old problem in a new shape.
Run a 15-minute weekly reset: everything goes back to its labelled home, lids get wiped, missing items get noted, and anything dry, dead or dried out goes in the trash. Once a year, repeat the full purge from step 2. A one-in, one-out rule handles the slow drift: a new marker set only arrives when the old one is finished or given away.
How you know it worked: four weeks in, a container is where it was on day one and the overflow basket is empty. That is the whole test.
Common Mistakes
Buying containers before measuring. The most common one, and the most expensive. The fix: write your shelf depth on the back of your hand before you check out, and measure the bin at home if you cannot find dimensions listed.
Putting everything in one large box. A monster bin looks organised and hides everything at the bottom. The fix: split by function into four or five containers, and keep the depth shallow enough that your hand reaches the contents.
Storing heavy materials overhead. Fix: weight low, weekly supplies at eye level, and nothing fragile above head height.
Labelling with vague words. “Crafts” and “misc” are how clutter comes back. Fix: label with the group and, where it helps, the number of items inside. “Markers, 24” tells you whether something has gone missing.
Making everything a child’s job. If the sharp tools, the small beads and the Cricut accessories sit in open low bins, the room will not stay tidy for a week. Fix: closed bins and high shelves for anything sharp, breakable or small enough to swallow; open trays for safe, frequent supplies only.
Mixing incompatible materials. Storing loose glitter, dried paint and a half-finished glue bottle in the same bin is how you get a permanent grey layer at the bottom. Fix: separate by material, and keep liquids upright in a lidded container inside a sealed bag.
One last tip: hold a compact system by resisting the urge to add a fifth way to store something. When a group does not fit anywhere, that is a sign to donate part of it, not to hunt for a new shelf.
Frequently Asked Questions
What are the best containers for organizing craft supplies in a small space?
For most small craft corners, three container types do nearly all the work: shallow open bins for markers, glue and crayons, clear lidded boxes for dust-prone groups like beads and sequins, and divided drawers for scissors, pens and clips. Add hanging file folders for full sheets of cardstock and printable colouring pages so they stay flat. Match every container to the shelf depth you measured, and label the front face so you can read it while carrying it.
How do I organize craft supplies without a craft room?
Pick one home for the whole collection rather than several partial ones, and make it a rolling cart or a lidded tote that comes out when you work and goes back when you do not. Store the rest vertically in a closet, under a bed, or in over-the-door racks. People who market crafts move everything into a single portable packout for exactly this reason: one place beats five.
How do I stop losing tiny craft supplies?
Use two layers. Put beads, buttons, brads, eyelets and sequins in small pill bags, snack bags or sandwich bags, then file those little bags upright inside one larger labelled container. Dividers inside a shallow drawer work the same way, keeping each type in its own slot. This is the approach people in r/crafting and r/scrapbooking repeat most often, and it is far more reliable than one deep jar of mixed parts.
How do I declutter craft supplies I never use?
Pull everything out at once and sort into four piles: keep, donate, sell and trash. Anything unused in the last 12 months that is not part of a current project leaves the house. Test what stays, because dried markers, glue that will not stick and paint gone chalky are dead weight. Donate in batches to a school or community group rather than making one trip per bag, and repeat the full sort once a year.
What is the best way to store paper and scrapbook supplies?
Store full sheets vertically in magazine holders, hanging file folders, or a paper rack, never flat under a pile of other paper, which causes curling and creases. Keep cardstock upright in a lidded bin sized for it, sort by colour or pattern family, and use shelf risers so you can pull one group from the front. Label the holder rather than the shelf, because the holders get shuffled.
How do I organize craft supplies in a rented apartment with no drilling?
Build the whole system from removable pieces: adhesive hooks and rails, tension rods, over-the-door organisers, freestanding shelf risers, a rolling cart, and bins on the closet floor. A pegboard is the one item that usually needs a wall, so a tension-rod rack or a folding screen works instead. Keep the footprint narrow enough that a closet door still closes, which is the test most renters care about.
Conclusion
Start today with three things: measure one storage spot and write down its width, depth and height, sort the supplies into broad functional groups, and give each group one clearly labelled home you can reach from where you sit.
Everything else, pegboard and rolling cart and dividers and under-bed bins, comes after that. A small craft corner is not built by owning the most storage. It is built by knowing what you own, where it goes, and how fast you can get it in your hands when you want to make something.