The safest way to sharpen colored pencils without breaking the tip is to cut the wood away first, then shape the core by turning the pencil in your hand rather than pushing it forward. A sharp blade shaves cedar; a dull blade or an oversized sharpener hole shears the soft core instead, and that shear is the snap. Finish the point on fine sandpaper and stop while the point still has length.
The whole job takes under a minute per pencil once you have the hang of it. Most breakage comes from one of three mistakes, so this guide covers the tools, the full method, and what to change when a point keeps snapping.
Table of Contents
- 1What You Need
- 2Step-by-Step
- 3How to Sharpen With a Craft Knife
- 4How to Refine the Tip With Sandpaper
- 5How to Use a Pencil Sharpener or Whetstone Safely
- 6How to Check and Store the Sharpened Pencil
- 7Common Mistakes
- 8Frequently Asked Questions
- 9Can you sharpen colored pencils in a regular pencil sharpener?
- 10Why do my colored pencils keep breaking when I sharpen them?
- 11What sandpaper grit should I use on a colored pencil core?
- 12How do I sharpen a colored pencil stub that is too short to hold?
- 13How do I keep a sharp colored pencil point from going blunt so fast?
- 14Conclusion
What You Need
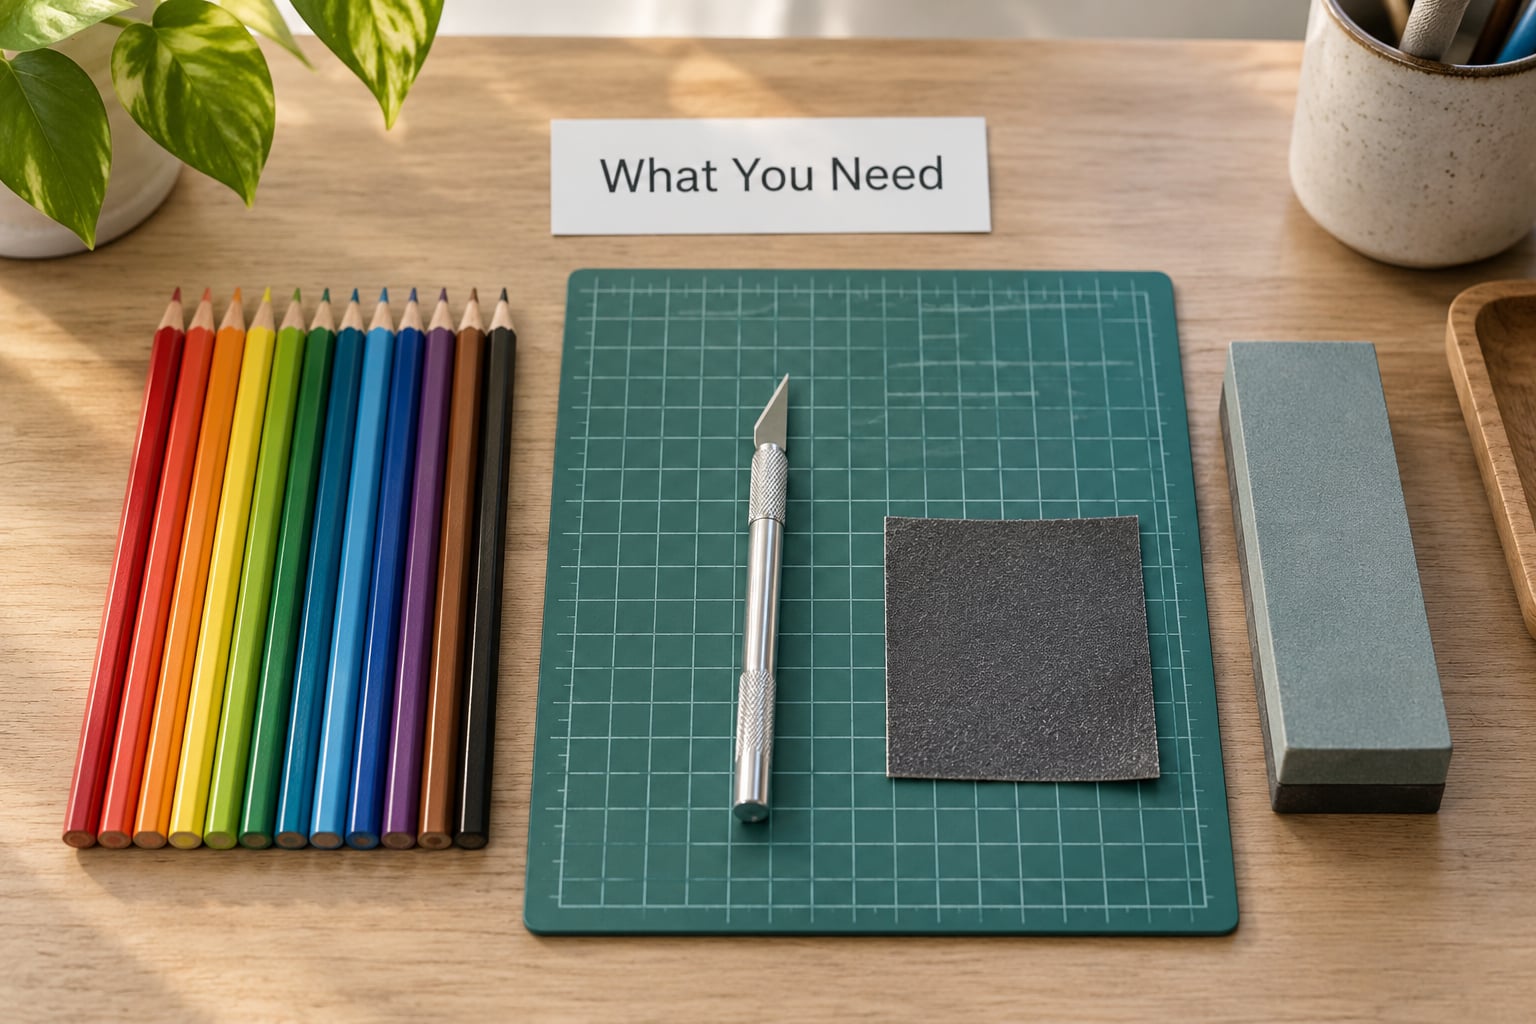
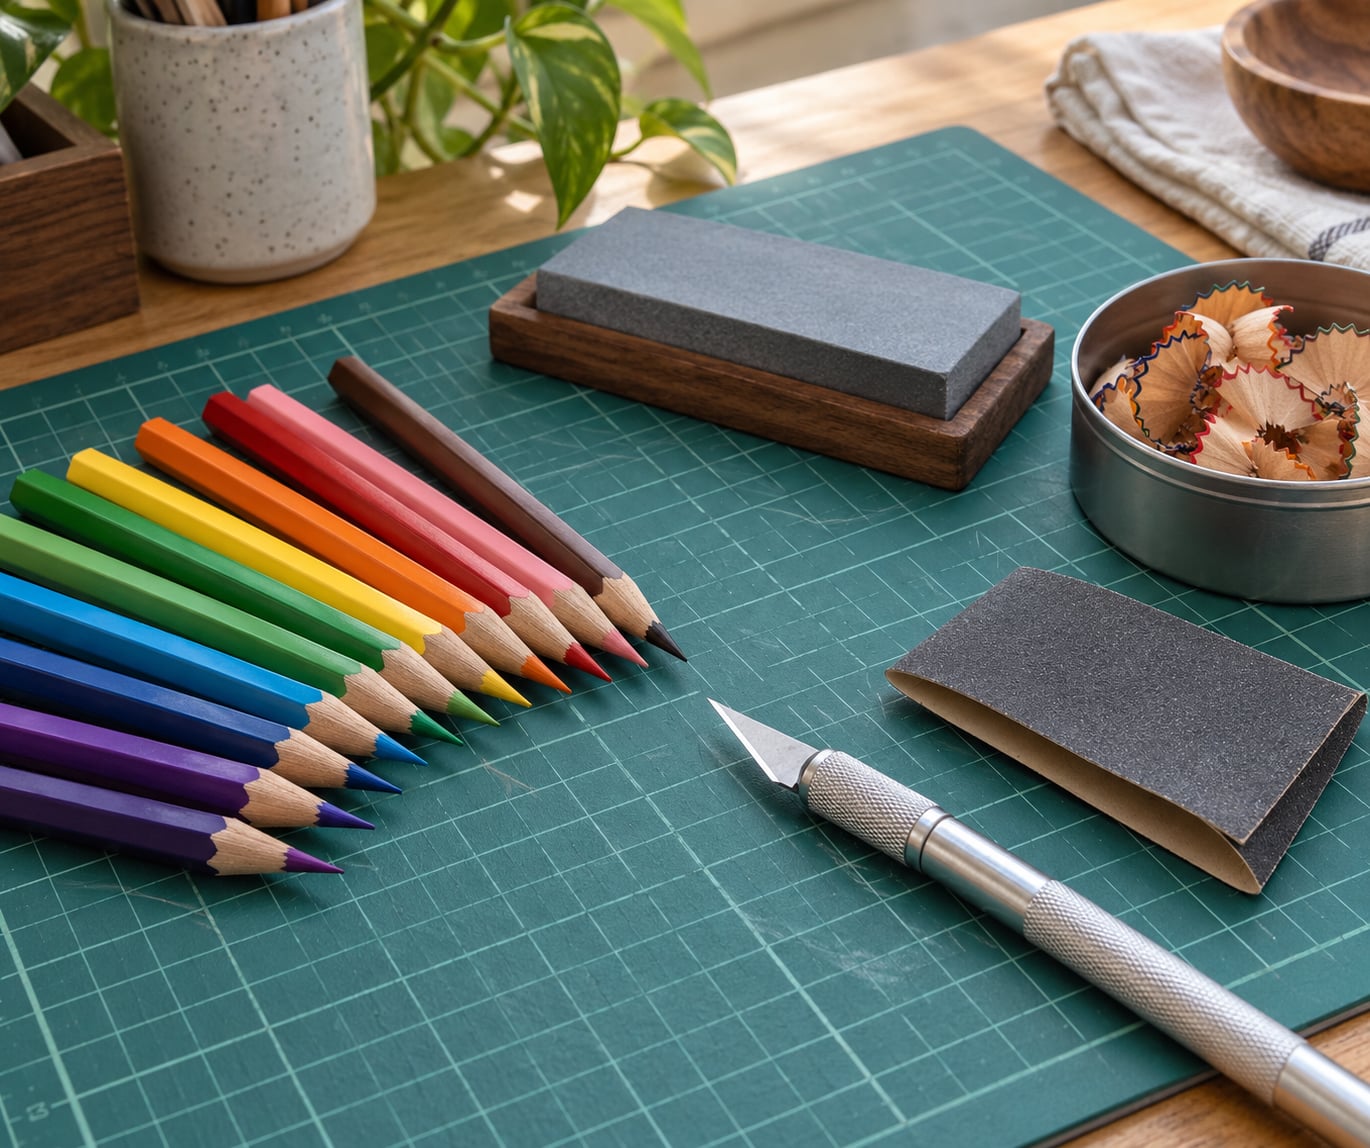
You need one cutting edge sharp enough to shave wood, one flat surface to catch the shavings, and one abrasive fine enough to round the point without chewing into the core. Beyond that, the tools are interchangeable.
- A sharp craft knife with a fresh blade. A craft knife or utility blade is the highest-control option and the one practicing colored pencil artists reach for. A dull blade is worse than no blade, because it tears the wood and snaps the tip.
- A cutting mat or a piece of scrap card. Shavings from a colored pencil are pale and stain, so work over something you can throw away or wipe clean.
- Fine sandpaper in three grits. 400 grit shapes a rough point, 800 grit is the workhorse, and 1500 grit polishes the tip so it lays down smoothly.
- A hand sharpener with a small hole. Keep one as a backup and as the tool for children. Colored-pencil sharpeners have a narrower opening than school sharpeners.
- A whetstone (optional). A sharpening stone gives a long, even, controlled point and is gentler on the core than a metal blade, but it takes practice.
- A pencil extender (optional). Once a pencil is down to about 2 cm, this is the way to keep using it.
- A soft brush or cloth. Core dust sticks to everything else.
The safest method for children is the hand sharpener, with an adult sitting beside them. The craft knife and whetstone methods are for older children and adults, because both reward a steady grip and punish a distracted one.
| Grit | Result | Best use |
|---|---|---|
| 400 | Rounds a rough knife point fast, slightly fuzzy finish | Shaping a point you just cut, or a pencil too short to be fussy about |
| 800 | Even point with a clean edge, minimal core loss | The daily work grit for wax and oil cores |
| 1500 | Polished tip, smooth laydown, less catching on paper | Finishing a point for detail work or blending |
Step-by-Step
Here is the full sequence: prepare the pencil, remove the wood with a blade or sharpener, cone the exposed core by rotating, round the point on sandpaper, test it, and store it. Only the third stage is where pencils get destroyed.
How to Sharpen With a Craft Knife
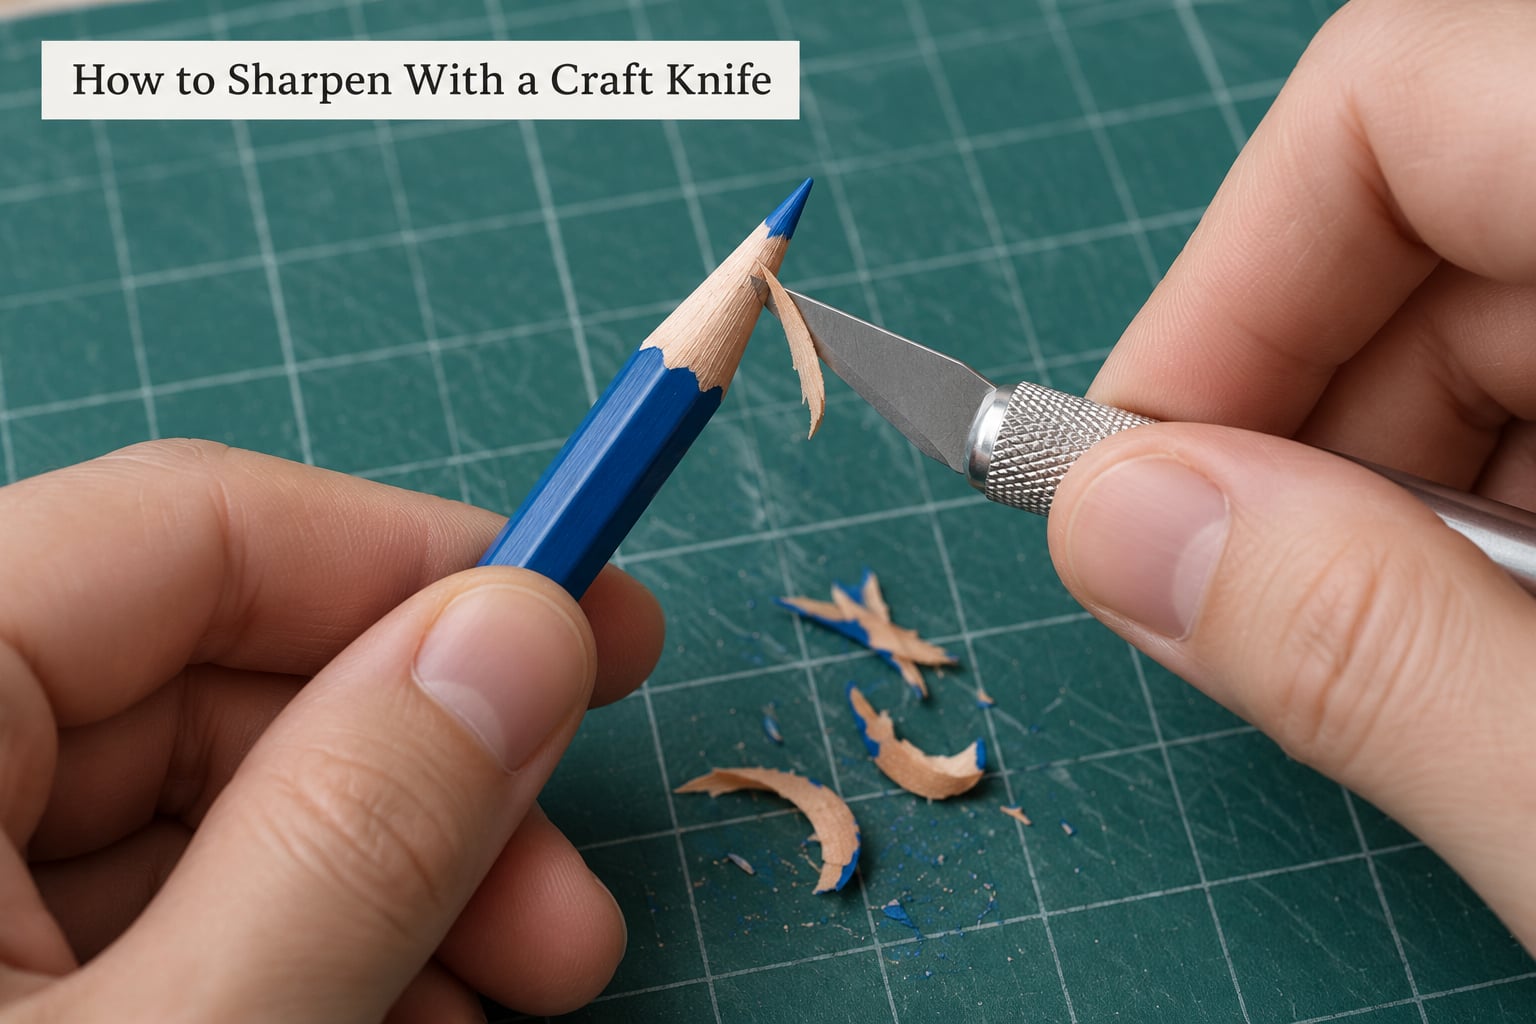
Hold the pencil in your non-knife hand, low and close to the blade end, with the barrel angled slightly down and away from your fingers. Take thin shavings of bare cedar, rotating the pencil a few degrees after every stroke, and stop as soon as a short cone of core sits above the wood.
- Set up on a cutting mat. Pencils roll, and a rolling pencil under a blade is how people get hurt.
- Grip low and close to the tip. Hold the last 3 cm of barrel, not the far end, so your hand stays a safe distance from the blade.
- Angle the blade with the pencil. Lay the blade almost flat against the barrel, cutting edge pointing away from your hand, and shave toward the end.
- Remove the lacquer first. A thin slice off the glossy coating tells you where the soft wood begins.
- Cut the wood in thin curls. Let the blade do the work. You want a spiral shaving, not dust.
- Rotate a few degrees after every stroke. Constant turning is what produces an even taper instead of a flat side.
- Stop when about 5 mm of core stands proud. Then roll it on sandpaper to round the point.
You will know the point is coming along when the wood forms a smooth, even cone and the shavings stay curly. If the shavings turn to powder, or the exposed core leans to one side, stop immediately, because the blade has started cutting into the core instead of the cedar.
How to Refine the Tip With Sandpaper
Rub the point across 800 grit in a tight rolling circle while turning the pencil between your fingers, using almost no downward pressure. Check every three or four rotations, and stop while roughly 4 to 5 mm of core is left, since a point that long holds up to normal drawing pressure.
Pressure is the whole game here. Push down and you sand the core flat instead of rounding it, which produces a chisel tip that breaks on the next line. Light rolling removes only the high spots and leaves a point with a real corner on it.
How to Use a Pencil Sharpener or Whetstone Safely
For a hand sharpener, rotate the pencil instead of pushing it in, and use the smallest hole that will take the barrel. A hole wider than the core shears the point off-centre, which is the direct cause of the common complaint about twisting a pencil through a sharpener for minutes and never getting a usable point.
If a point shears, the hole is too big, not the pencil too soft. Sharpeners built for colored pencils use a narrower bore and a smaller blade, and they take soft wax cores without shearing them.
On a whetstone, lay the exposed core flat on the stone and roll it away from you with one fingertip, working one facet at a time until you have a pyramid rather than a cone. Because the stone abrades instead of shears, it produces the longest and most even point, at the cost of speed.
For children, the hand sharpener is the safe option and the craft knife is not. Keep the knife in an adult’s hands until a child is comfortable with a rotary cutter, and never let a child sharpen while walking, talking, or holding something in the other hand.
How to Check and Store the Sharpened Pencil
Test the point with one light stroke on scrap paper rather than on the drawing. A good point draws a clean line with almost no pressure; a blunt or uneven one needs heavy pressure, which smudges and is the real reason tips break during use rather than during sharpening.
If the line is fuzzy, the point is too short, so go back to 400 grit and remove a fraction more. If the line is scratchy and skips, the point is uneven, so roll it once more on 800 grit and check again.
Store sharpened pencils in a case, a cup, or a roll with the points not touching anything. A point that is bumped in a pencil bag is blunt before you start, and a blunt point is the one most likely to snap in the sharpener later.
Common Mistakes
Almost every broken colored pencil comes down to cutting into the core, cutting at an angle, or using more pressure than the material can take. Each of those has a simple correction.
- Cutting toward your hand. Turn the pencil so the blade always travels away from your fingers, and keep your thumb behind the pencil tip.
- Sharpening too hard. A sharp blade with light pressure removes wood cleanly; pressure only adds heat and splintering.
- Using coarse sandpaper. 400 grit on a finished point chews the core into a fuzzy stub. Save it for shaping.
- Holding the pencil at an unstable angle. Rest your hand on the table or a flat mat and let the pencil rotate in your fingers.
- Over-sharpening the core. Five millimetres of exposed core is plenty. A longer taper looks impressive and snaps in your hand.
- Testing with heavy pressure. A light stroke tells you everything you need to know and does not ruin the point.
| Symptom | Cause | Fix |
|---|---|---|
| Tip snaps off inside the sharpener | Dull blade or a hole wider than the core | Change the blade, or switch to a small-hole colored-pencil sharpener |
| No point after several turns | You are pushing the pencil forward instead of rotating it | Turn the pencil in your fingers, advancing it in small amounts |
| Point leans to one side | Uneven rotation while cutting the wood | Redo the cone, rotating after every stroke, and check it upright |
| Point is short, rounded and useless | Too much pressure on sandpaper | Roll lightly, stop at 4 to 5 mm of core, and never push down |
| Pencil keeps snapping no matter what you do | Core already cracked inside the barrel | Turn the barrel against the light, or warm it in your hands, to expose the crack |
Two habits prevent most of this. Clear the shavings after every few pencils, because a packed sharpener dulls and heats the blade, and check the barrel under a light now and then, since a core that cracked inside the pencil will break no matter how carefully you sharpen the outside.
Frequently Asked Questions
Can you sharpen colored pencils in a regular pencil sharpener?
Yes, but only if the hole is smaller than the barrel and you rotate the pencil rather than pushing it forward. School sharpeners with wide holes shear the soft core off-centre, which is why people twist a pencil for minutes and never get a usable point. If the point keeps snapping, the hole is too big for that pencil, and a colored-pencil sharpener with a narrow bore will work immediately.
Why do my colored pencils keep breaking when I sharpen them?
Four causes account for nearly all of it: a dull blade that tears instead of cuts, pushing the pencil forward rather than rotating it, sharpening the exposed core with a sharpener built for wood pencils, and applying pressure instead of turning. A fifth cause is hidden: the core can crack inside the barrel, so no amount of careful sharpening fixes that pencil. Rotate, keep the blade fresh, and stop at 5 mm of exposed core.
What sandpaper grit should I use on a colored pencil core?
Use 800 grit for almost all finishing. Coarser 400 grit shapes a rough knife point but fuzzes a core quickly, and 1500 grit is for polishing a finished tip so it lays down smoothly. A single sheet of 800 grit stapled to a paint stick makes a cheap sanding stick that is easier to control than a loose sheet, which matters because pressure is what breaks these points.
How do I sharpen a colored pencil stub that is too short to hold?
Do not try to sharpen a stub that is shorter than about 2 cm. At that length the core sits at the level of your fingertips and any sharpening method becomes a finger risk. Screw the stub into a pencil extender or a mechanical pencil refill adapter, then sharpen normally on the exposed end. You will get several more usable centimeters out of a pencil most people throw away.
How do I keep a sharp colored pencil point from going blunt so fast?
A sharper point lasts longer, so cone the wood evenly and stop at 4 to 5 mm of core rather than grinding down to nothing. A very long taper looks precise and collapses after a few lines. Polish the finished tip on 1500 grit to reduce catching, lighten your pressure so you are not dulling it with friction, and keep pencils in a case or a cup where the points never touch anything.
Conclusion
Start with the simplest version that works: shave the wood away with a fresh blade or a small-hole sharpener, rotate the pencil instead of pushing it, leave about 5 mm of core, then roll the point lightly on 800 grit and stop. Work over a cutting mat, keep the blade away from your fingers, and leave the knife to adults when children are sharpening.
Once the point is finished, put it somewhere it will not be bumped, and a colored pencil will hold a clean detail line for far longer than one ground down to nothing.